Uploading participant documents and setting expiry dates for staff access.
Overview
Keeping participant documents up to date is essential for maintaining efficiency, as Staff can access these documents during shifts to ensure all tasks are completed and participants receive care tailored to their individual needs. Below is a brief guide on how to quickly and efficiently upload updated documents.
Uploading Documents
Navigate to the CRM > Participants. Here You will see the list of participants. Then Select the Participant for whom you want to Upload Documents. Selecting the Participant will bring up their Profile.
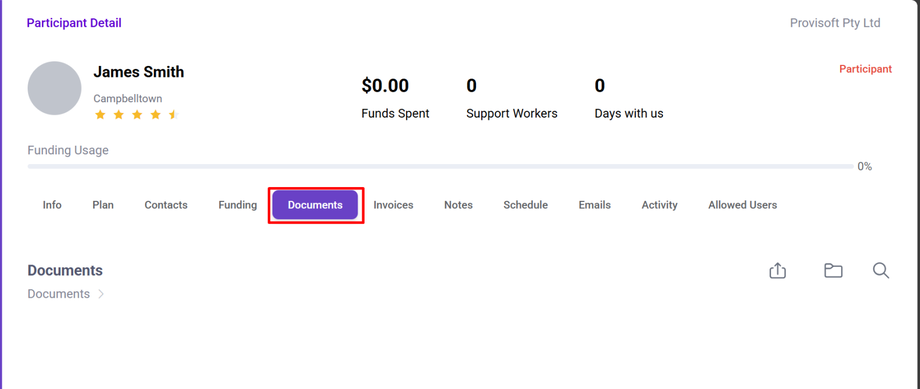
To upload the documents simply click on the Documents Tab.
Here, you can view the list of uploaded documents, allows you to upload documents and create separate folders to organize different types of documents. The ability to create separate folders helps keep files structured, making it easier to locate important documents quickly and manage them efficiently. Additionally, this feature ensures that carers and staff can access the right documents when needed.
Create a Folder
To Create a folder Click on the Folder icon.
This will open a Popup Form where you can Enter the name of the folder that need to be Created.
After entering the name of folder, Then click on the Save Button which will Add Folder.
Uploading Documents
To upload a Document Click on the Upload icon.
Clicking on this Open a Upload Files Window, Which allow you to upload the document.
You can Upload the document by either :
- Clicking on "Click to upload", which will open your file explorer so you can select a file.
- Dragging and dropping a file directly into the upload area.
After selecting a file you will see a expiry date option where you can set the expiry date of documents.
If there is No expiry date, Click on the No Expiry Box.
It is crucial to have the expiry dates for each document (if applicable) as this will assist in setting documents remainder.
Note : After Selecting the file and Setting the Expiry date Click on the Save Button for uploading the file.


