Add Participant
In this article we will cover :
- Overview
- Add New Participant
- Adding an Contact for Participant
- Funding
- Invoices
Overview
Before generating a shift for a participant, you must ensure that their data is entered into System.
Add New Participant
Note :
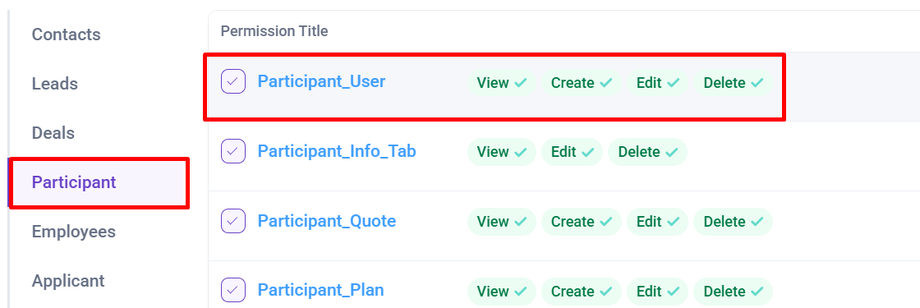
- To View the Participant You need to have Permission : Participant > Participant_User >> View :Yes
- To add the Participant You need to have Permission : Participant > Participant_User >> Add : Yes
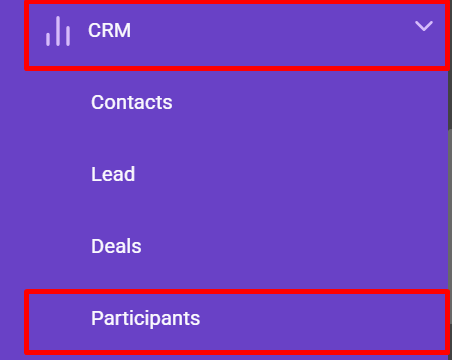
Navigate to the main menu on the left-hand side. Select the CRM tab. This will open a drop-down menu, in the menu select the tab labelled Participant.
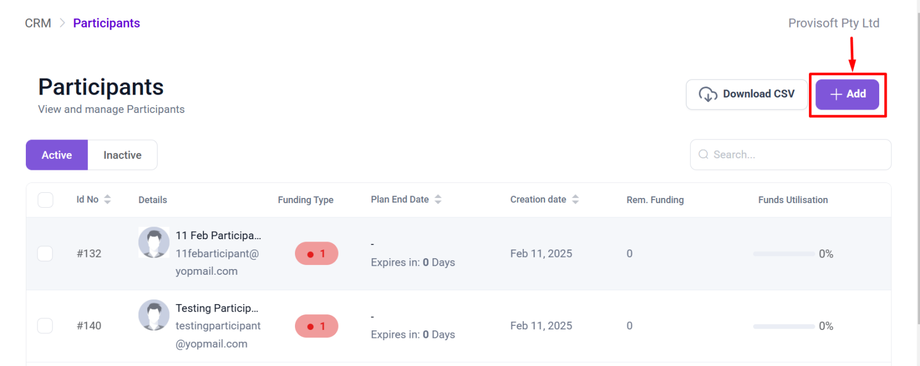
Clicking on Participants, Opens up a below page
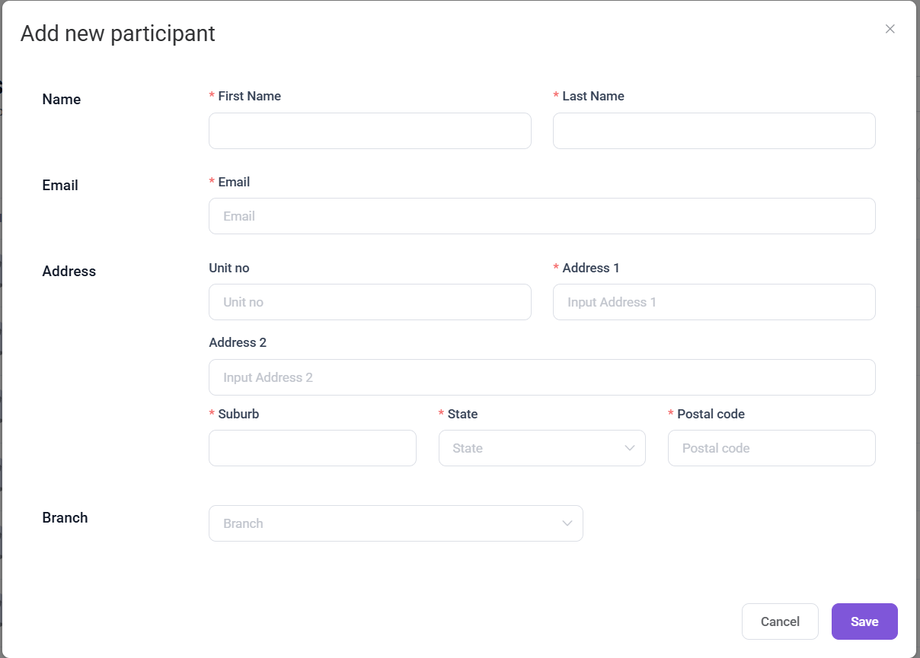
To add a new participant, click on the +Add Button. Clicking on the +Add Button opens up a form.
Now fill in the participant details like Name, Email, Address as this are the information required to create a participant. Select the Branch as it is used to assign the participant to the specific location. And Click on the Save Button to Create a Participant. This will add New Participant to the list.
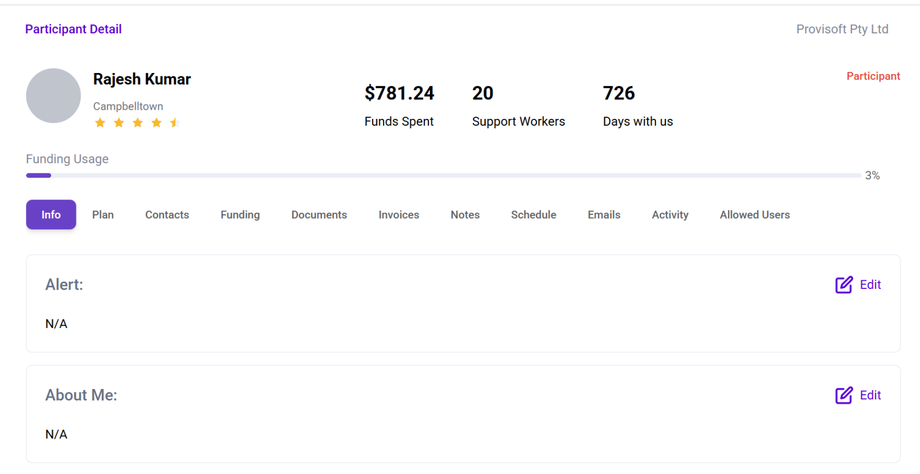
Now to view the Participant details first filter out the participant using the search Bar then click on the name of the participant.
This will open up a new page where you can add other details of participant and create funding.
Adding an Additional Contact for a Participant
To add an additional contact (such as a family member or partner) for a participant, first navigate to the Contacts section.
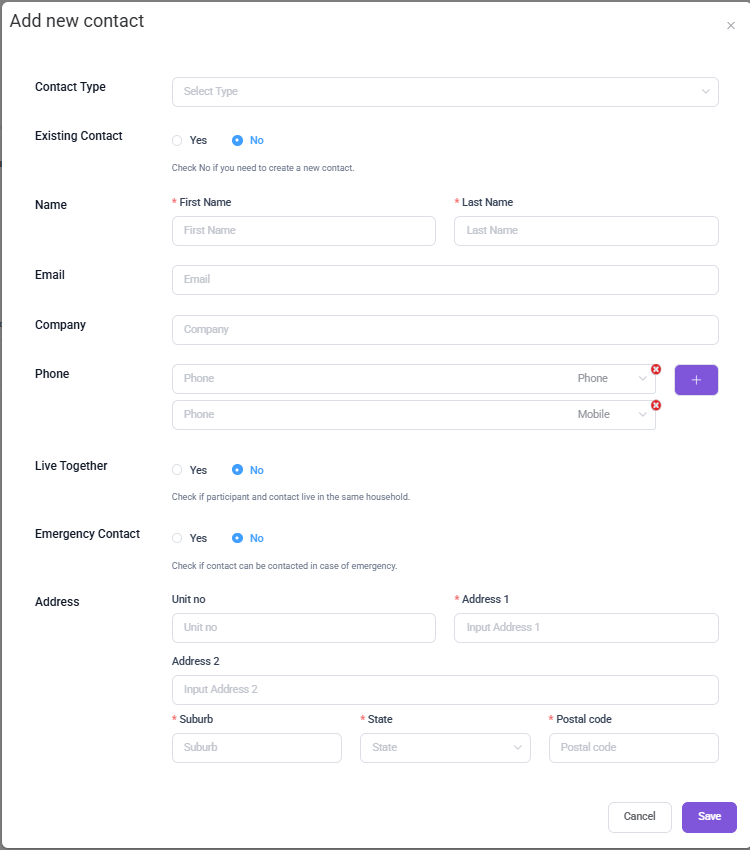
This Will bring you to the Contact section and clicking on +Add Button will open up a below form where you can enter the new contact details.
Now, you can enter details such as Contact Type, Name, Phone Number, and Address. You can also specify whether the contact already exists and if they live with the participant. If this contact can be used for Emergencies, Select "Yes." Once all required fields are filled, click "Save" to add the contact.
Funding
The Funding section is used to manage financial allocations for the services a participant requires. It allows you to add specific services, set their start and end dates, and assign a budget to ensure that expenses are tracked properly.
To add funding, first, click on the Funding tab. This will open the funding section.
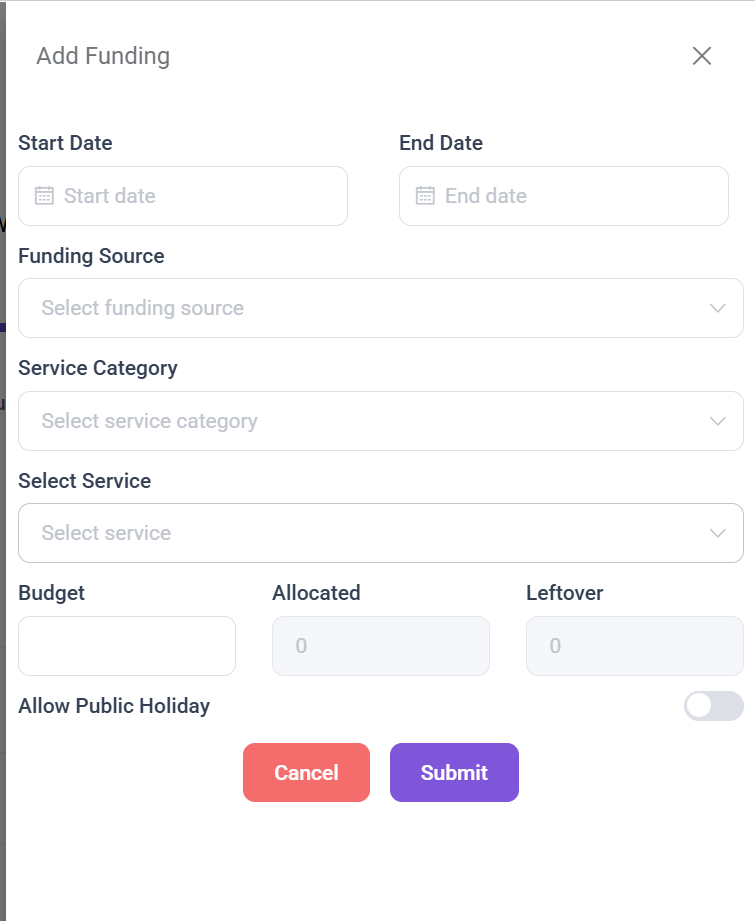
Click on the + icon , this will open a below form.
Now ,fill out the form to add funding, select the start and end dates, choose a funding source, service category, and specific service. Enter the budget, track allocation, and enable public holiday allowance if needed. Click Submit to save the funding details.
Invoices
Participant invoice cannot be generated from this page. However, you can view this information on the Participant details page. To view the invoice Click on the Invoices Tab.

